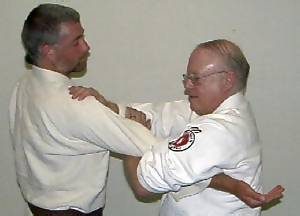
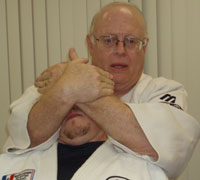
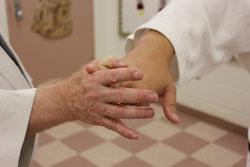
This armlock is ideal to use on a larger person or if you have small hands. It’s an excellent alternative to the wrist press armlock & is now used by a number of major law-enforcement agencies. Once set you have a great deal of control over the person & it can be quite painful – so use caution!
A knife at your throat from behind is a serious threat to your life [understatement]. If the person wants your possessions [money, jewelry, car, etc …] give it to the assailant. They can all be replaced. YOU CAN’T! However, here are some initial responses that can be used to get the knife away from your throat if you have to defend yourself. You must immediately continue on with a follow-through technique to remove yourself from imminent danger.
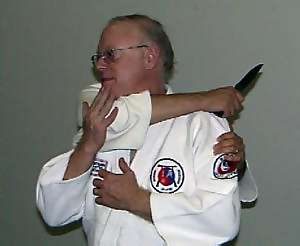
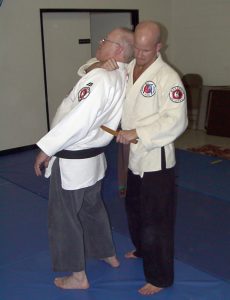
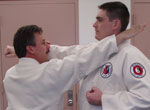
For a rear forearm choke attack and a knife coming up at your throat. Who thought of this attack? Charles Choi wanted my input on what to do for such an attack.
This is a defense for a knife in your back, with your back arched. Practice this defense slowly to achieve smoothness. It is an extremely fast technique once proficiency is achieved because your constantly working in a circle. Be careful though. You can’t complete this technique without posing the risk of serious injury to your workout partner.
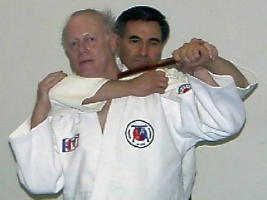
This is a defense for a knife in your back & a forearm choke with your back straight. This is a more difficult situation than having your back arched as you don’t have any “wiggle room.” Be sure to check my footwork as you learn this technique. Footwork is always critical.
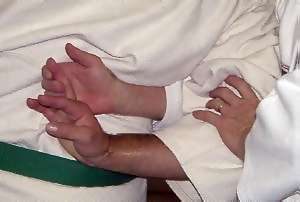
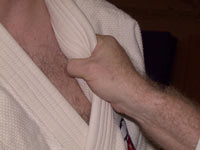
When you grab a gi in randori/grappling it is common to see competitors grab their opponent’s gi with a grip where their thumb grabs the gi from underneath [or opposite their fingers & palm] like when you normally grab something.
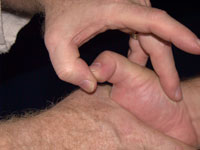
One common mistake made by newer students is to place both thumbs next to each other when setting up the hand throw [te nage] or wristlock takedown [tekubi shimi waza]. The problem with this placement is that the tori is pushing down at two points, rather than one. A second common mistake in setting up either the hand throw or wristlock takedown – shown here – is placing all your fingers of both hands on the inside of the uke’s wrist.
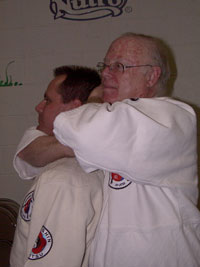
The Carotid Artery Press can be an extremely effective means of putting your opponent out — quickly. Unfortunately it also poses a high risk of serious injury or death if not applied properly throughout execution of the hold.
This takedown is another safe alternative to the figure-4 carotid neck restraint. In addition to pressing down on the bridge of the nose, it also eliminates the person’s vision until they are down; a fairly disorienting asset.
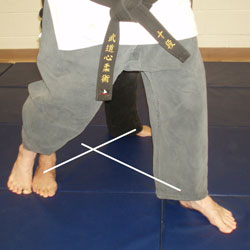
Some people are having problems properly setting their footwork for a Tai-Otoshi. The is a tendency to place their right foot as much as 1-2 feet behind the right foot of the uke, blocking the leg just below the knee joint rather than at his ankle. As a result the right leg locks at the knee joint, thus making the throw very difficult to execute & placing a high risk of injury to both tori and uke. This series shows the correct foot placement for the tori’s right & left feet.
In some Ju-Jitsu ryu this is a secret technique taught only to black belts. In Budoshin Ju-Jitsu, and other ryu, it’s taught to white belts because of its simplicity and ease of helping students learn the concept of self-control and control of their attackers. it can be a very gentle technique which will only cause a gag response by the attacker. It can also be a fatal technique if the “victim” is in fear for their life. So this technique should be used with a great deal of caution.
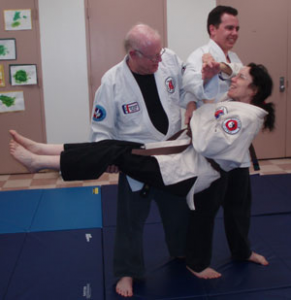
Uki Otoshi is one of the most difficult techniques to learn in jujitsu, requiring almost a “leap of faith” for lack of a better term. In the 1970’s three of my junior high brown belts came up with a quick way to help students learn this difficult throw. Students using this method usually had the throw down after 4-5 repeats of this “supported” approach.